New Dometic Replacement Cooling Units are a great way to repair your RV refrigerator. Our remanufactured units are built with superior materials, craftsmanship, and packaging to offer long-lasting performance.
After replacing your RV refrigerator’s cooling unit, make sure you install the new evaporator foam pack. You may also need to apply evaporator sealing tape and Thermo-Mastic around the frame rails that secure the unit to your RV.
1. Remanufactured units
Remanufactured units are a dime a dozen and can save you hundreds of dollars in replacement costs. The remanufactured unit is the best way to go when your refrigerator is on the fritz. New Dometic RM3662, RM3663, and RM2652 remanufactured coolers come with a 2 year limited warranty that covers both parts and labor. The remanufactured cooler is also a cinch to install. For the true aficionado, a bit of patience and the requisite tools are all that is required for the most rewarding rv ac units cooling experience of your life.
2. Replacement parts
Whether you’re a weekend warrior or a full-time RVer, your air conditioner is an essential piece of equipment that will keep you cool and comfortable. At Boat & RV Accessories, we offer a wide selection of brand-name replacement parts for your Dometic AC unit.
Using the right replacement parts can make troubleshooting and fixing problems on your air conditioner much easier. At Boat & RV Accessories, we work with many of the top manufacturers to bring you the best parts at competitive prices.
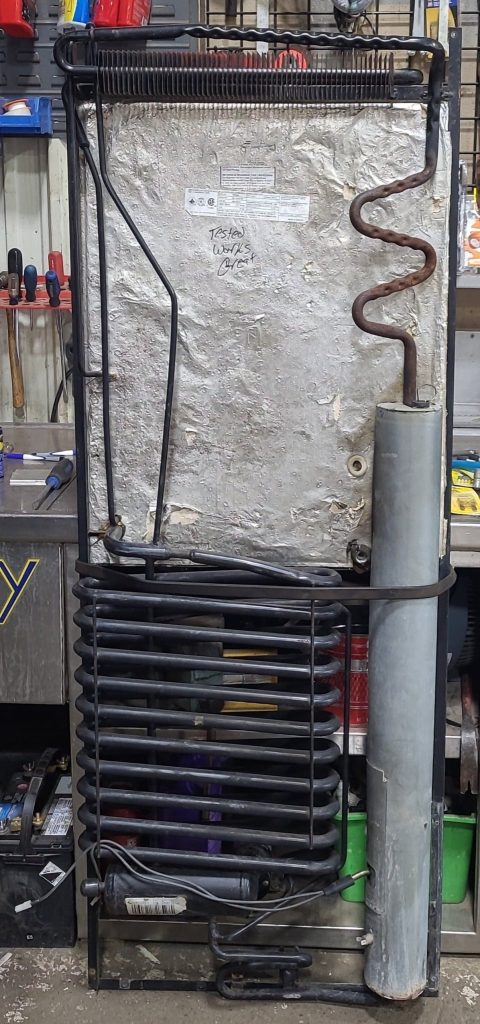
When replacing your cooling unit, be sure to remove the sheet-metal wind baffle at the top of the flue tube. Next, transfer the electric heaters and boiler housing to your new cooling unit, following the instructions in the manual. Lastly, be sure to install the ARP boiler temperature sensor according to the instructions in your service manual. This is one of the most temperamental parts on your air conditioner, so be prepared with a spare.
3. Installation
New Dometic Replacement Cooling Units are installed by removing the old unit and replacing it with the new one. This can be done on a Dometic RV or Norcold model and requires careful attention to safety precautions.
To remove the cooling unit, you need to access the rear of the refrigerator and find all screws that hold it in place. On Dometic models, there are frame rails that have screws that pass through into the RV, and Norcold models often have a sheet-metal pan with screws passing through it.
Then, carefully pry out the cooling unit without damaging the cabinet or paneling. You may need to place a piece of 6×6 wood 10 to 11 inches long on the floor to help push the cooling unit out.
When replacing the old unit with the new, you need to apply evaporator sealing tape and Thermo-Mastic before installing it into the fridge. This is especially important on Dometic units where the evaporator foam pack has a frame member that blocks the application of the sealing tape.
4. Installation instructions
One of the most daunting tasks in RV refrigerator repair is removing your old cooling unit and installing the replacement. There is a lot of work involved and this task can take days to complete, especially if you have multiple units. To make the job easier, consider putting your refrigerator on a dolly or lifting it off the ground with a large piece of wood.
New Dometic Replacement Cooling Units can be found in a variety of configurations and sizes to suit any budget. The best way to go about identifying and selecting the right unit is to read the manual or ask your service representative. This will save you both time and money, and you won’t have to worry about replacing the wrong one. It also ensures that you get the most for your money. To help you choose the right solution for your RV, we have a wide selection of cooling unit replacements in stock at our facility.